Schritt für Schritt Anleitung Um dein Amazon Verkaufskonto erstellen
Die folgende Schritt für Schritt Anleitung zeigt dir, wie du deinen eigenen Amazon Seller Account erstellen kannst. Grundlage für die Anmeldung ist ein erfolgreich angemeldetes Unternehmen, das Vorhandensein eines Firmenkontos und der Besitz einer Kreditkarte. Wenn du noch kein Unternehmen gegründet hast, kann dir unser Hilfeartikel FBA Unternehmensgründung als Anleitung dienen. Für die Erstellung deines Seller Account solltest du die folgenden Daten bereithalten:
Gültiger amtlich ausgestellter Personalausweis oder Reisepass
Aktuelle Kontoauszüge oder Kreditkartenabrechnungen (mit Firmenanschrift)
Zu belastende Kredit- oder Debitkarte
Mobiltelefon
Wenn du alle notwendigen Daten vorliegen hast kannst du direkt losstarten!
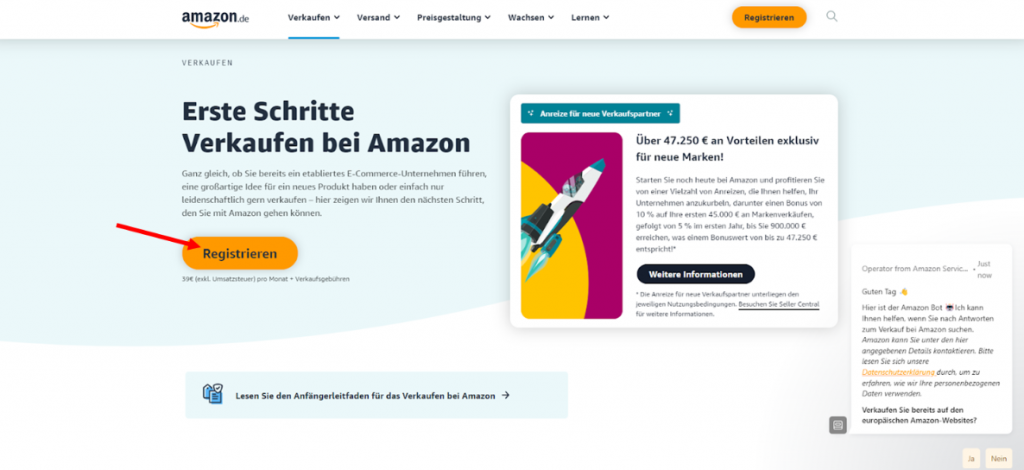
Registrierungsseite über das Amazon Seller Central aufrufen
Um deinen Amazon Seller Central Account zu erstellen, gehst du am besten auf die offizielle Amazon Seite für neue Seller. Hier findest du weitere hilfreiche Tipps für den Verkauf auf Amazon. Auf der Seite Angekommen klickst du einfach auf den “Registrieren” Button.
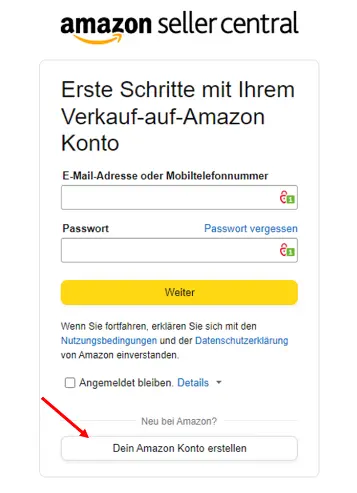
Im Amazon Konto anmelden
Im nächsten Schritt wirst du von Amazon auf die Anmeldeseite weitergeleitet, die dir evtl. schon von deinem privaten Amazon Account bekannt vorkommt. Hier empfiehlt es sich über den Button “Dein Amazon Konto erstellen” ein neues Amazon Konto für dein Unternehmen zu erstellen. Hierzu folgst du einfach den Anweisungen in der Maske:
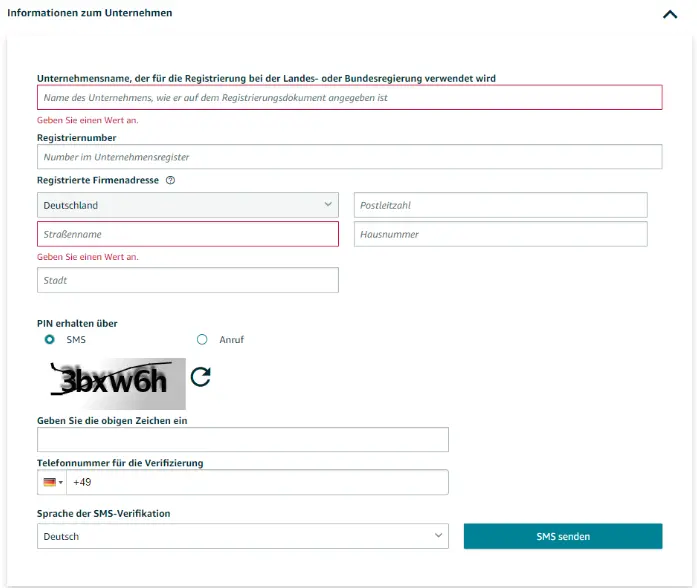
Informationen zum Unternehmen
Im nächsten Schritt geht es nun darum, Amazon alle wichtigen Daten zum Unternehmen und zur Verfügung zu stellen.
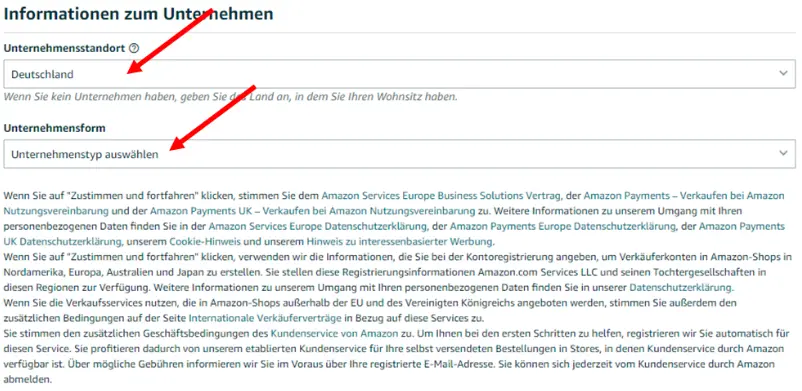
Zuerst wählst du deinen Unternehmensstandort und deine Rechtsform aus. Für die Rechtsform bietet Amazon die folgenden Entitäten zur Auswahl an:
- Staatliches Unternehmen
- Börsennotiertes Unternehmen
- Unternehmen in Privatbesitz
- Hilfsorganisationen
- Einzelunternehmen
- Nichts davon, ich bin Einzelanbieter
Wenn du also eine GmbH, UG oder eine andere Kapitalgesellschaft gegründet hast, ist die richtige Auswahl für dich das Unternehmen in Privatbesitz. Hast du dagegen ein Einzelunternehmen gegründet, ist die richtige Wahl für dich das Einzelunternehmen.
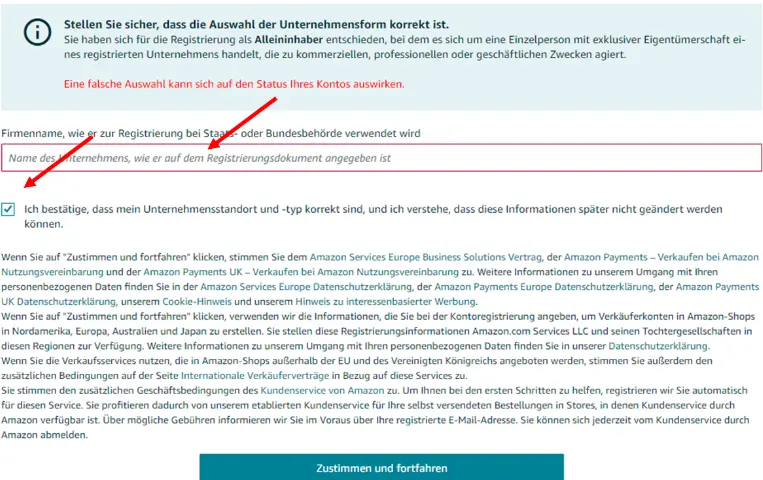
Anschließend gibst du deinen Unternehmensnamen an und bestätigst die Echtheit deiner Angaben:
Verkäuferinformationen
Nachdem wir im vorherigen Schritt alle Informationen zum Unternehmen bereitgestellt haben geht es nun darum, weitere Informationen zu Ansprechpartnern und dem verkaufenden Unternehmen selbst zur Verfügung zu stellen. Hierzu die Angaben in der folgenden Maske eingeben:
Tipp für Einzelunternehmen: Als Einzelunternehmen hast du in der Regel keine Registriernummer wie z.B. im Handelsregister. Um trotzdem in der Maske weiterzukommen, kannst du hier entsprechend den Wert “Keine” eintragen.
Daten zur primären Kontaktperson angeben
Der Eingabemaske folgen und die Daten zur primären Kontaktperson angeben.
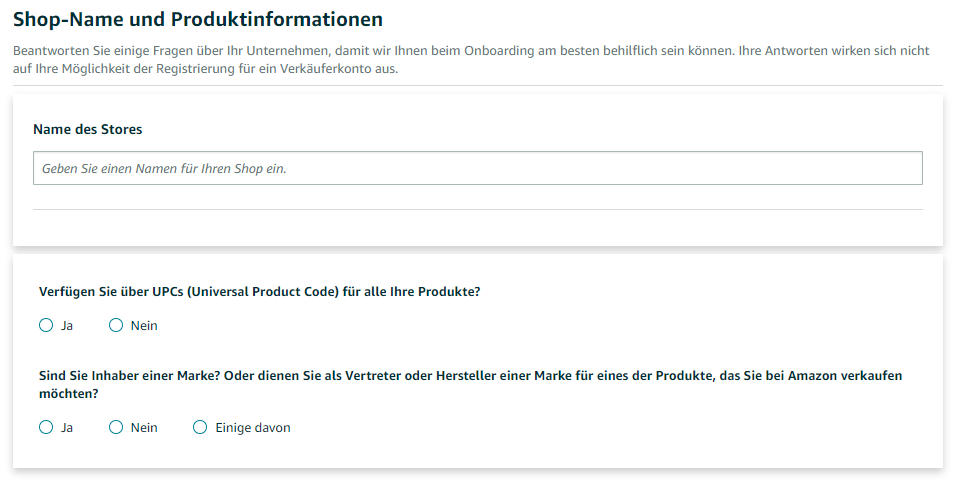
Shop-Name und Produktinformationen
Im nächsten Schritt gibst du nun deinen Shopnamen und weitere Produktinfos an. Falls dir dein Shopname aus irgendeinem Grund später nicht mehr gefallen sollte, kannst du diesen im Nachgang noch ändern.
Daten überprüfen und verifizieren – Amazon Seller Account erstellen
Um deinen Amazon Seller Account nun zu erstellen kommst du im nächsten Schritt auf eine zusammenfassende Darstellung in der du alle deiner gemachten Angaben nochmals auf Korrektheit prüfen solltest. Lade die benötigten Dokumente hoch und springe zum letzten Step, der Überprüfung.
Hierzu wirst du dich in einem kurzen Videocall gegenüber einem Amazon Mitarbeiter verifizieren lassen müssen. Folge hierzu einfach den Angaben im Portal sowie den Anweisungen des Amazon Servicemitarbeiters im Telefonat.
Wie geht es weiter?
Deine Angaben werden im nächsten Schritt verifiziert. In der Regel bekommst du innerhalb von 5 Werktagen eine Rückmeldung zum Status deines Accounts.
Erfahre in der Zwischenzeit hier welche Schritte nach der Erstellung deines Accounts notwendig sind damit du schnellstmöglich auf Amazon verkaufen kannst.
Hast du noch Fragen? Kontaktiere uns gerne per Mail oder erfahre
hier, wie wir als Amazon Agentur Deinen Seller Alltag vereinfachen können!